Initial Setup
Setup Wizard
When you launch QuakeOverlay for the first time, a 3-step setup wizard will guide you through the initial configuration. Just follow the on-screen instructions to get started.
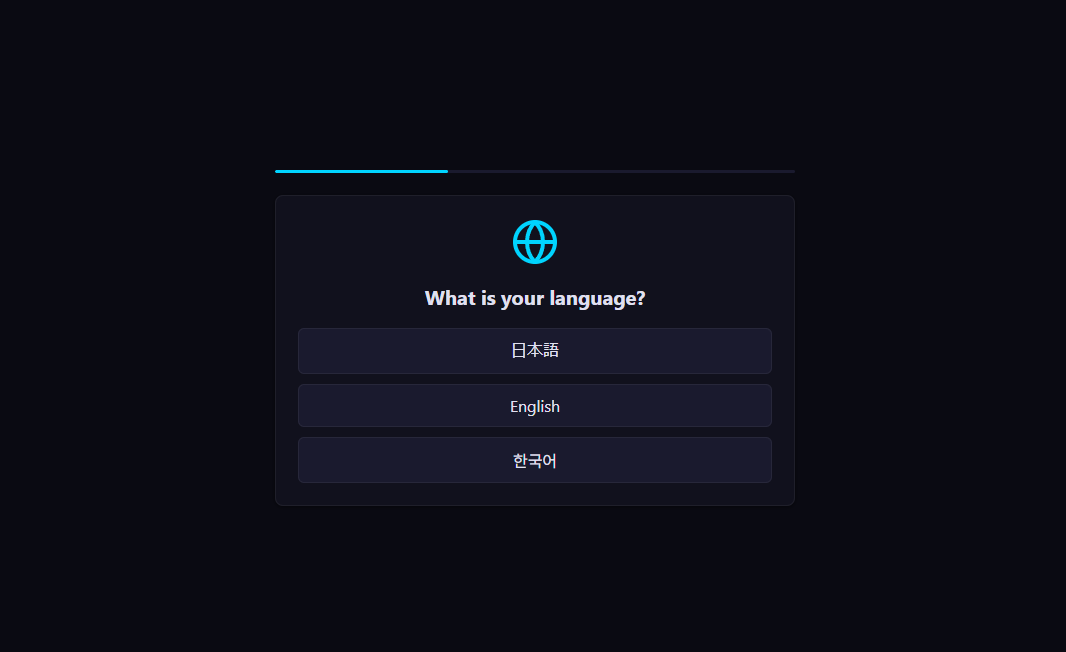
Step 1: Language Selection
Choose your preferred display language for the app. You can select from the following three languages:
- 日本語 (Japanese)
- English
- 한국어 (Korean)
The selected language will be applied across the entire app interface. You can change the language later from the settings page.
Step 2: Welcome Screen
The welcome screen introduces you to QuakeOverlay's four main features.
| Feature | Description |
|---|---|
| Real-time Data | Fetches earthquake data in real time from the P2P Earthquake Information API |
| Notifications | Displays alert notifications when an earthquake occurs |
| Theme Customization | Customize the look and feel of your overlay |
| OBS Integration | Use the overlay directly as a browser source in OBS Studio |
Detailed settings for each feature can be configured within the app after completing the setup.
Step 3: OBS Setup Guide
The app provides an in-app guide for connecting with OBS Studio. The next section covers the OBS configuration in detail, so you can follow along using both this guide and the in-app instructions.
OBS Studio Integration
QuakeOverlay provides two separate overlay URLs. Each one should be added as its own browser source in OBS.
| Overlay | URL | Purpose |
|---|---|---|
| Alert Overlay | http://localhost:47815/overlay/alerts/ | Displays earthquake alert notifications |
| Map Overlay | http://localhost:47815/overlay/map/ | Displays the epicenter and seismic intensity map |
Adding Browser Sources
Repeat the following steps for each of the two overlays.
- Open OBS Studio
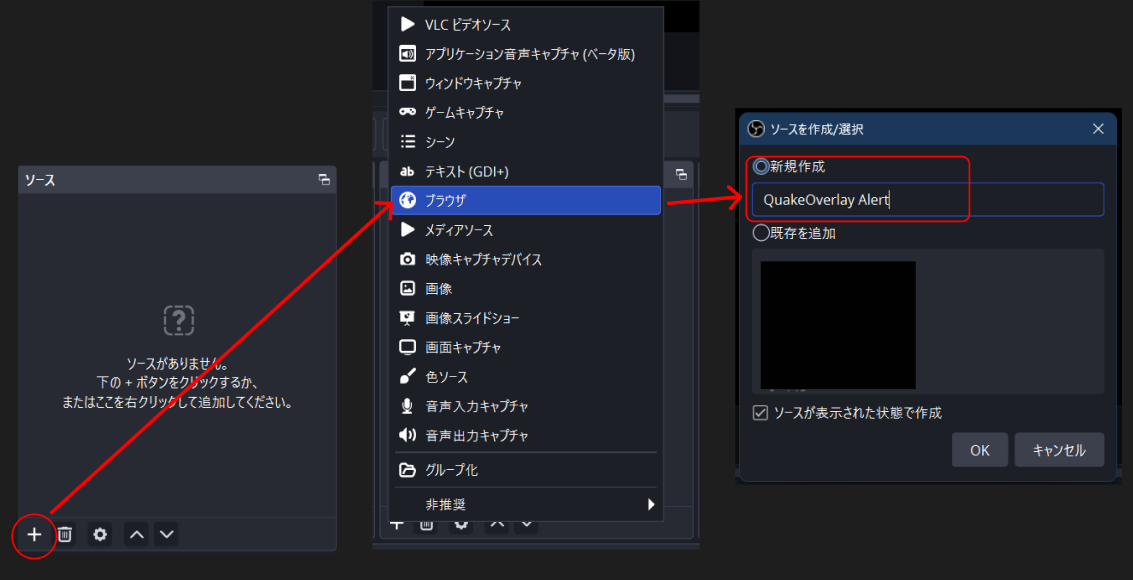
- In the Sources panel, click the + button
- Select Browser from the list
- Choose "Create new" and enter a descriptive name
- For alerts: "QuakeOverlay Alert"
- For map: "QuakeOverlay Map"
- Click OK to open the properties dialog
Browser Source Properties
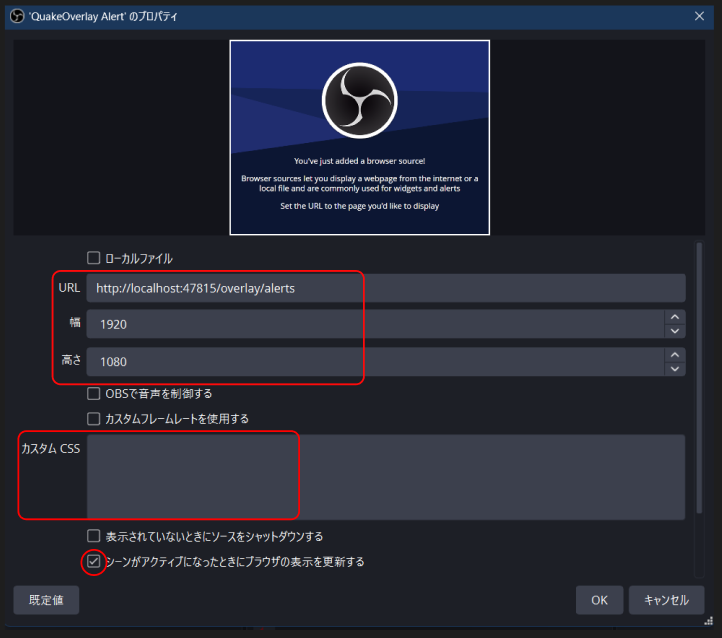
In the properties dialog, enter the following values.
The URL is displayed on the "Overlay" page in the app. Since the port number may vary depending on your environment, we recommend copying the URL directly from the app.
For the Alert Overlay:
URL: http://localhost:47815/overlay/alerts/
Width: 1920
Height: 1080
For the Map Overlay:
URL: http://localhost:47815/overlay/map/
Width: 1920
Height: 1080
Recommended Options
Make sure to configure the following options in the properties dialog.
| Setting | Recommended Value | Reason |
|---|---|---|
| Shutdown source when not visible | Unchecked | If enabled, the connection will drop when switching scenes |
| Refresh browser when scene becomes active | Checked | Refreshes the overlay to the latest state on scene switch |
| Custom CSS | Leave empty | Styles are managed by QuakeOverlay, so this should remain empty |
Testing the Overlay
Once the setup is complete, verify that both overlays are working correctly.
Running a Test
- Open the Overlay page in the QuakeOverlay app
- Click the Test button
- Check OBS for the following:
- Alert Overlay: A test alert notification should appear
- Map Overlay: A test map display should appear
If both overlays show the test content, your setup is complete.
Checking Connection Status
You can check the connection to the P2P Earthquake Information API from the connection status card on the Dashboard page.
| Status | Description |
|---|---|
| Connected | Successfully connected to the API. Receiving earthquake data in real time |
| Connecting | Attempting the initial connection to the API |
| Reconnecting | The connection was temporarily lost and is being re-established |
| Disconnected | The connection to the API has been lost. Check your network settings |
If the status shows "Disconnected", try the following:
- Verify that your internet connection is active
- Check that your firewall or security software is not blocking QuakeOverlay
- Restart the app and try connecting again